Thursday, March 31, 2011

Butter London British Racing Green

St. Patty's day is long over, but I still have pretties to show for it!  To celebrate the holiday, Butter London ran a fab promo where if you bought $24 (I think) worth of stuff, they'd throw in a free British Racing Green polish.  Since British Racing Green had been on my wish list for a while, and $24 was easily covered by buying two other polishes, I was sold!  (I picked up Marrow and No More Waity Katie, so stay tuned for those!)

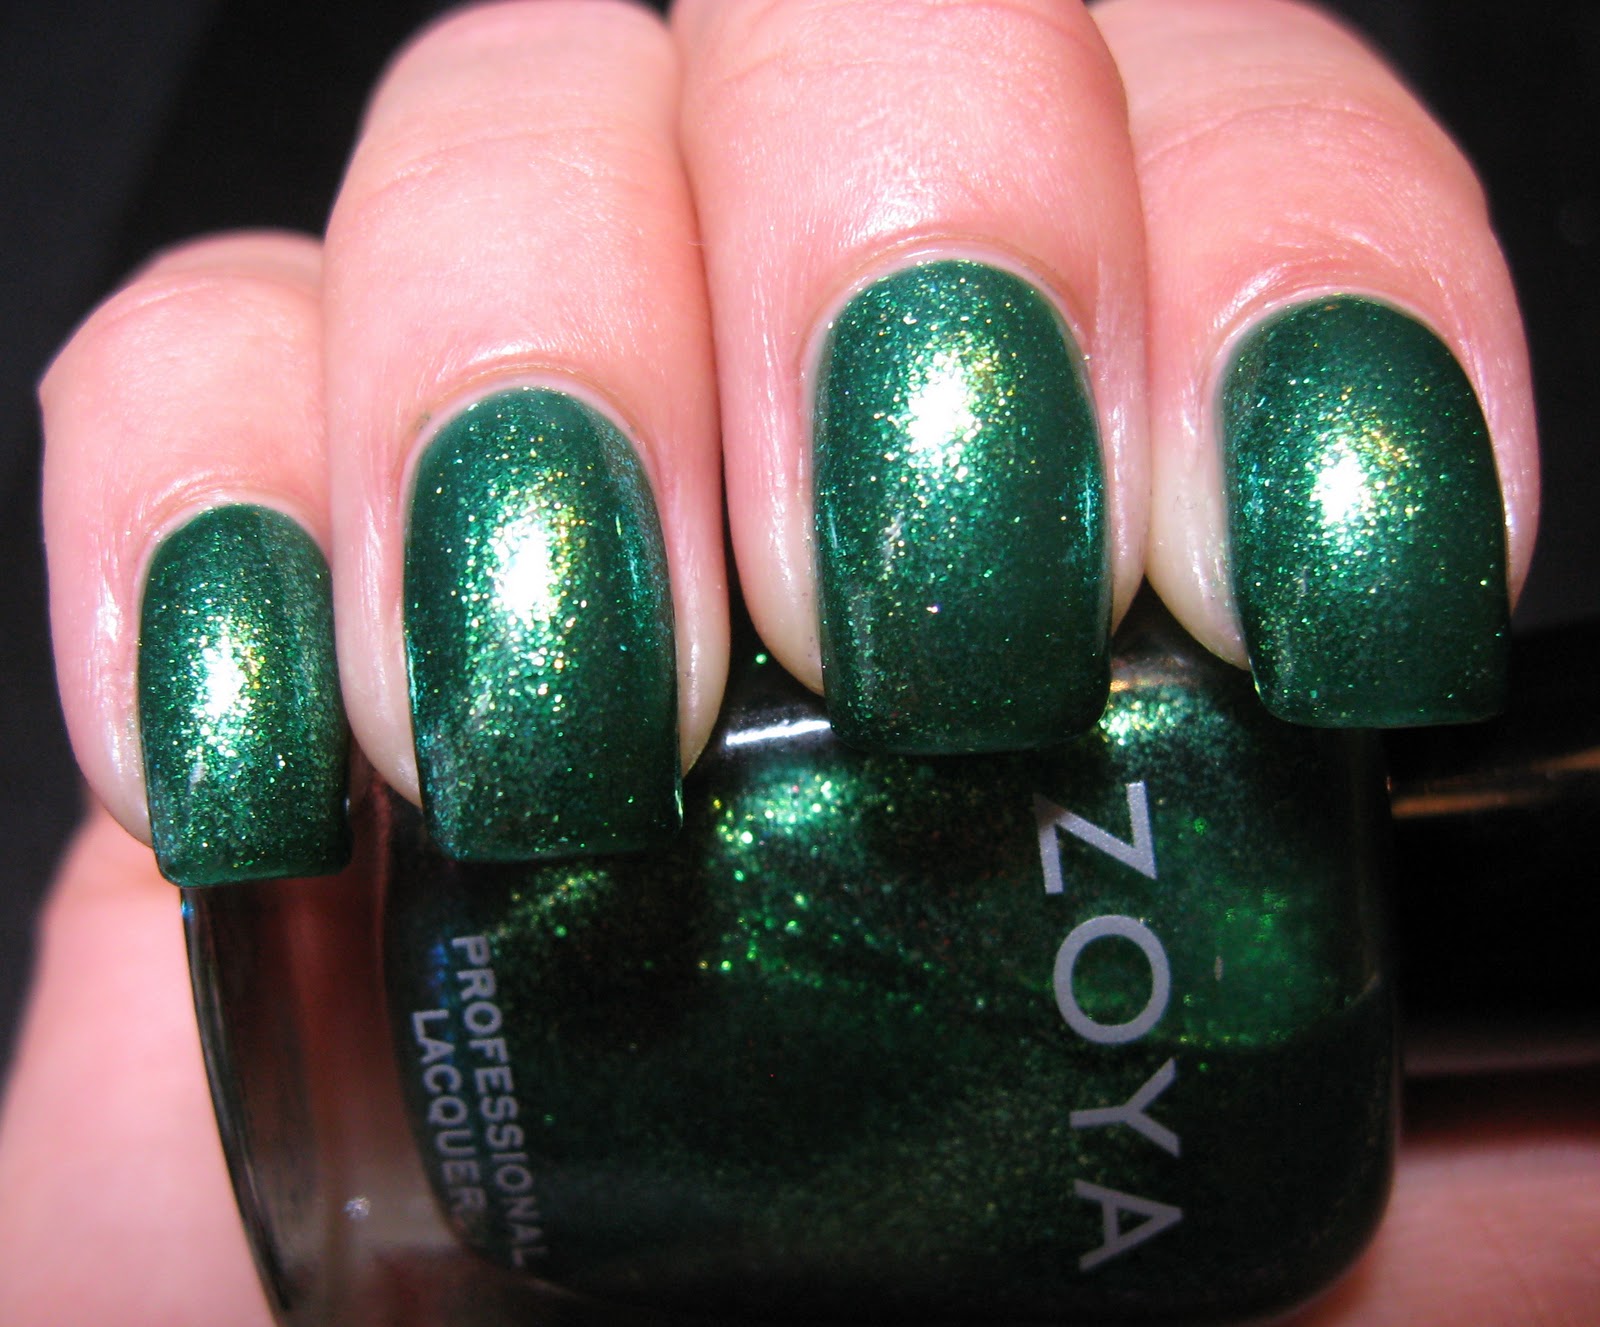
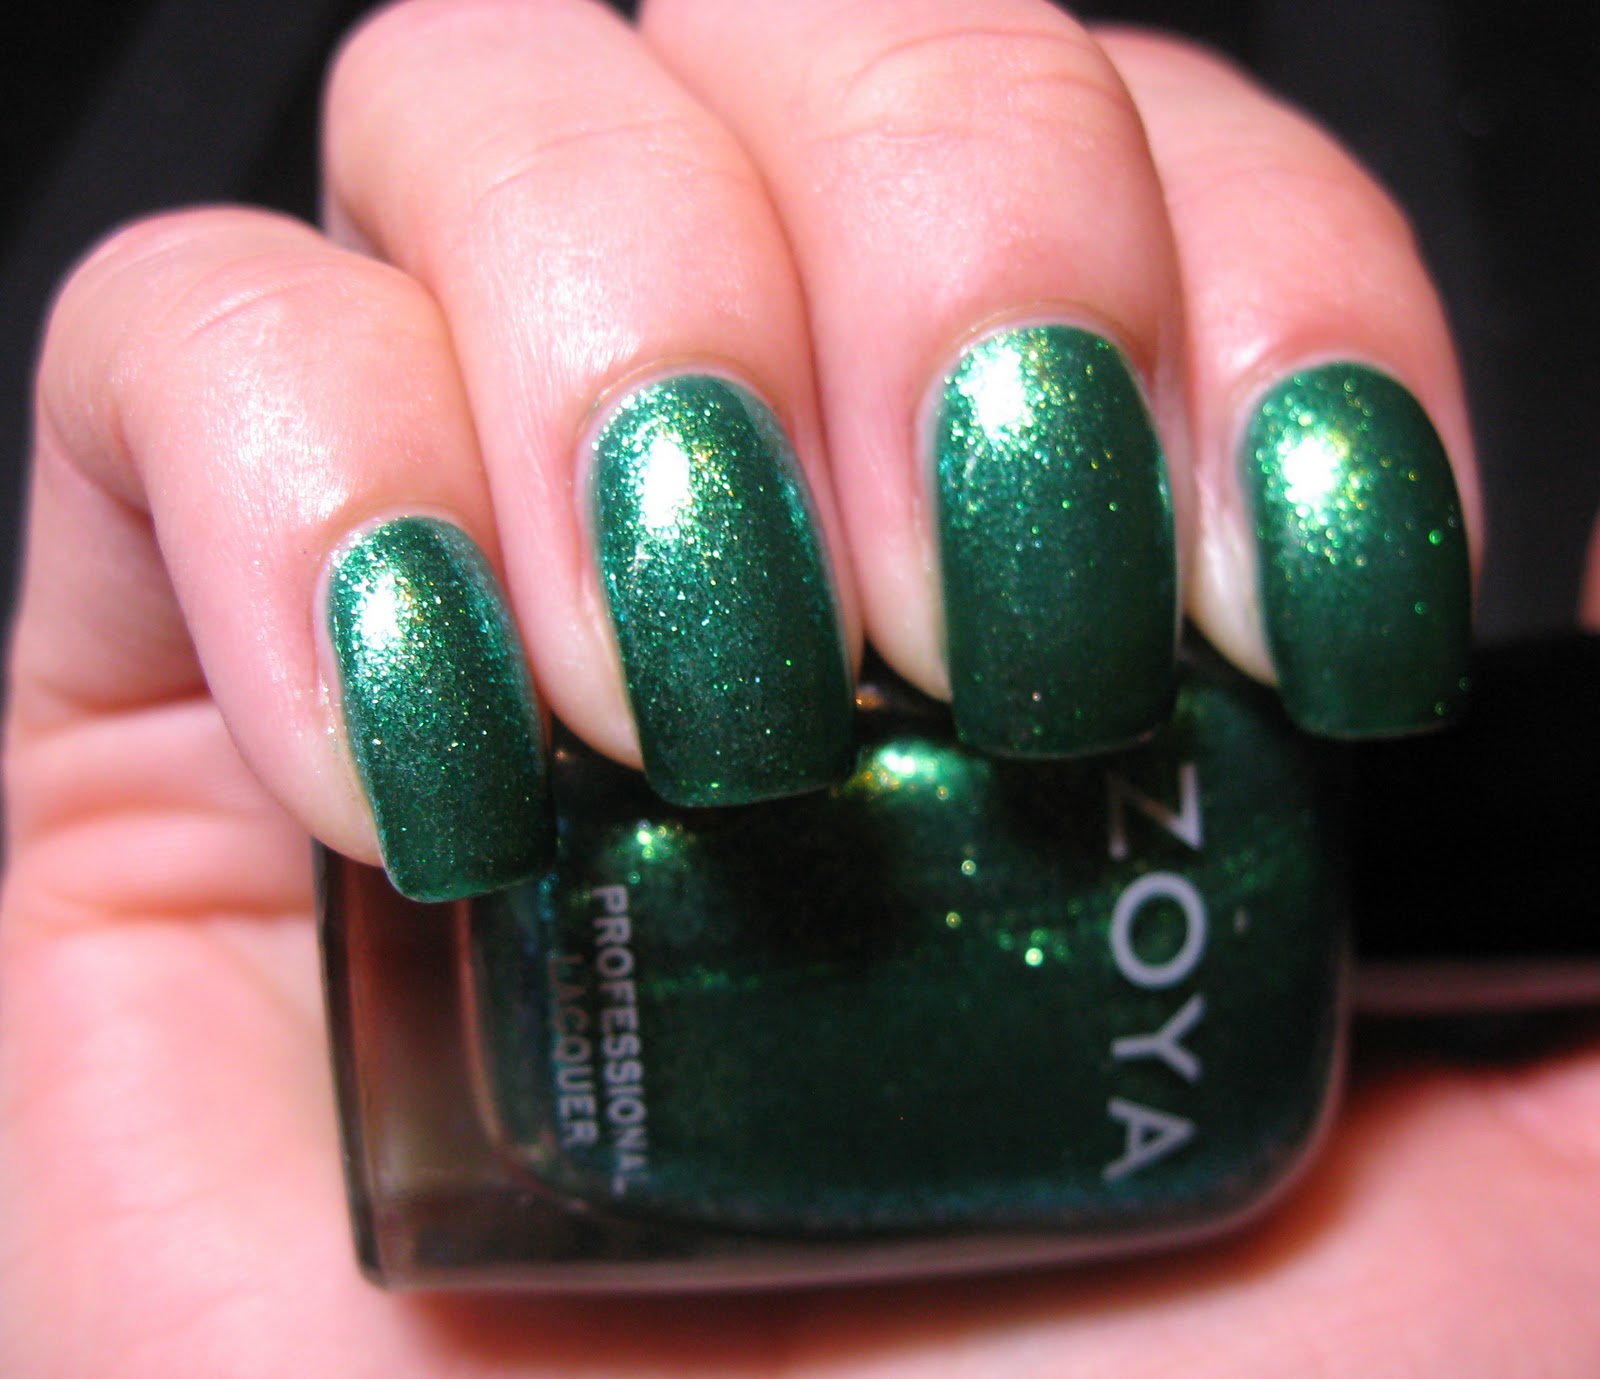
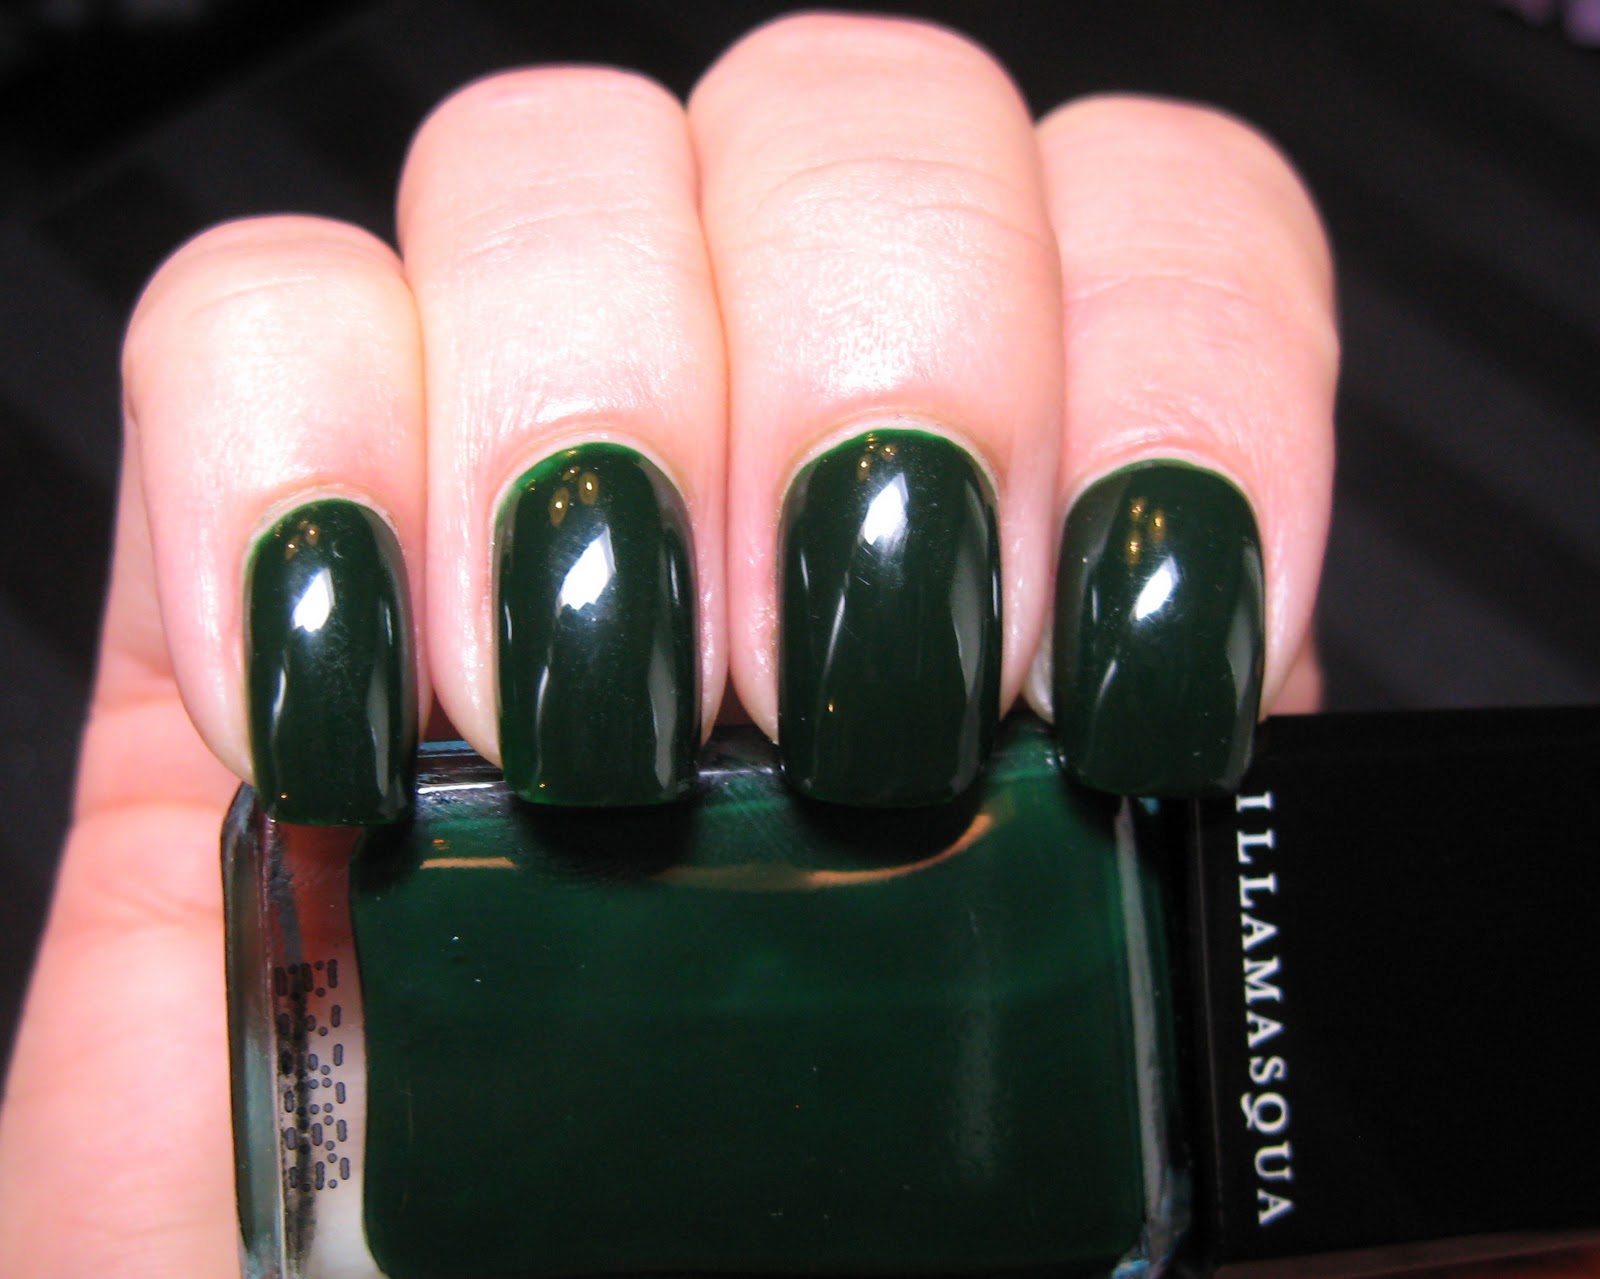
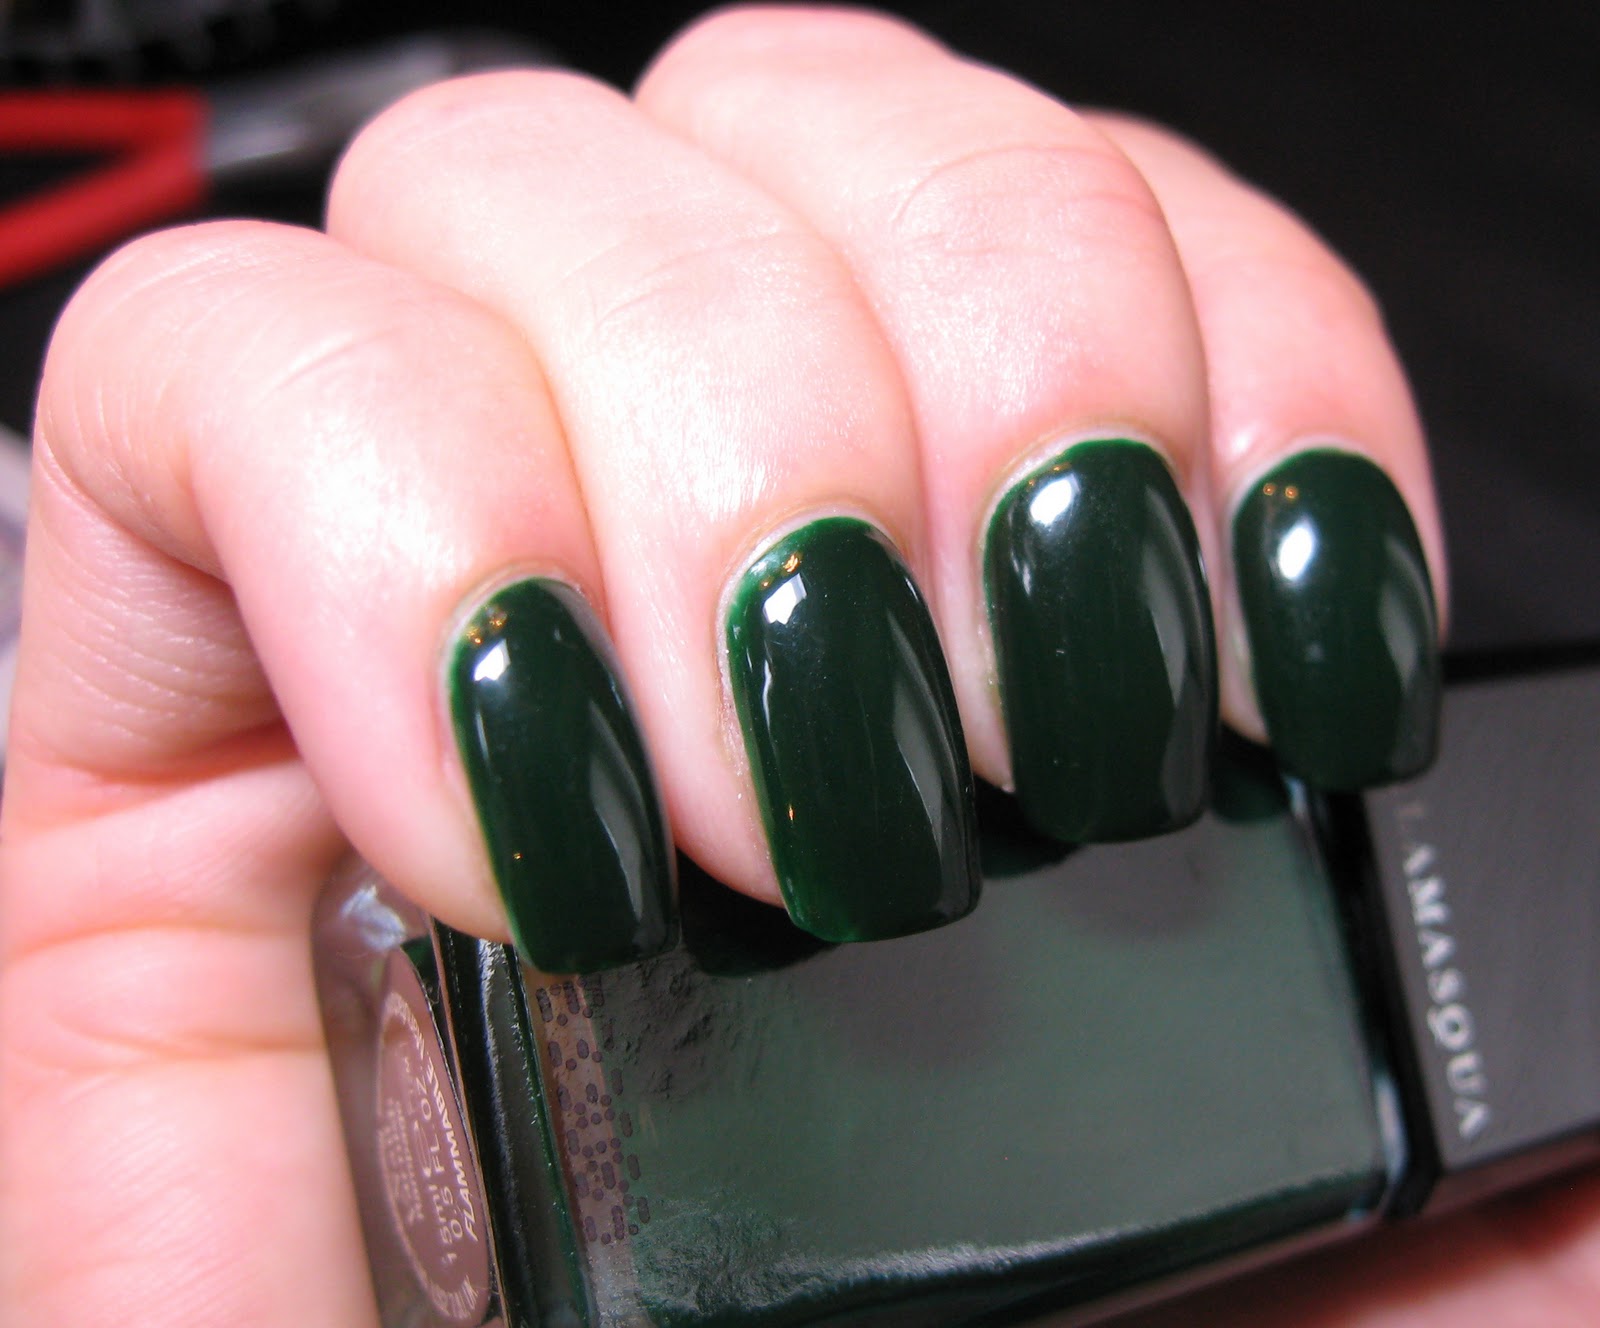
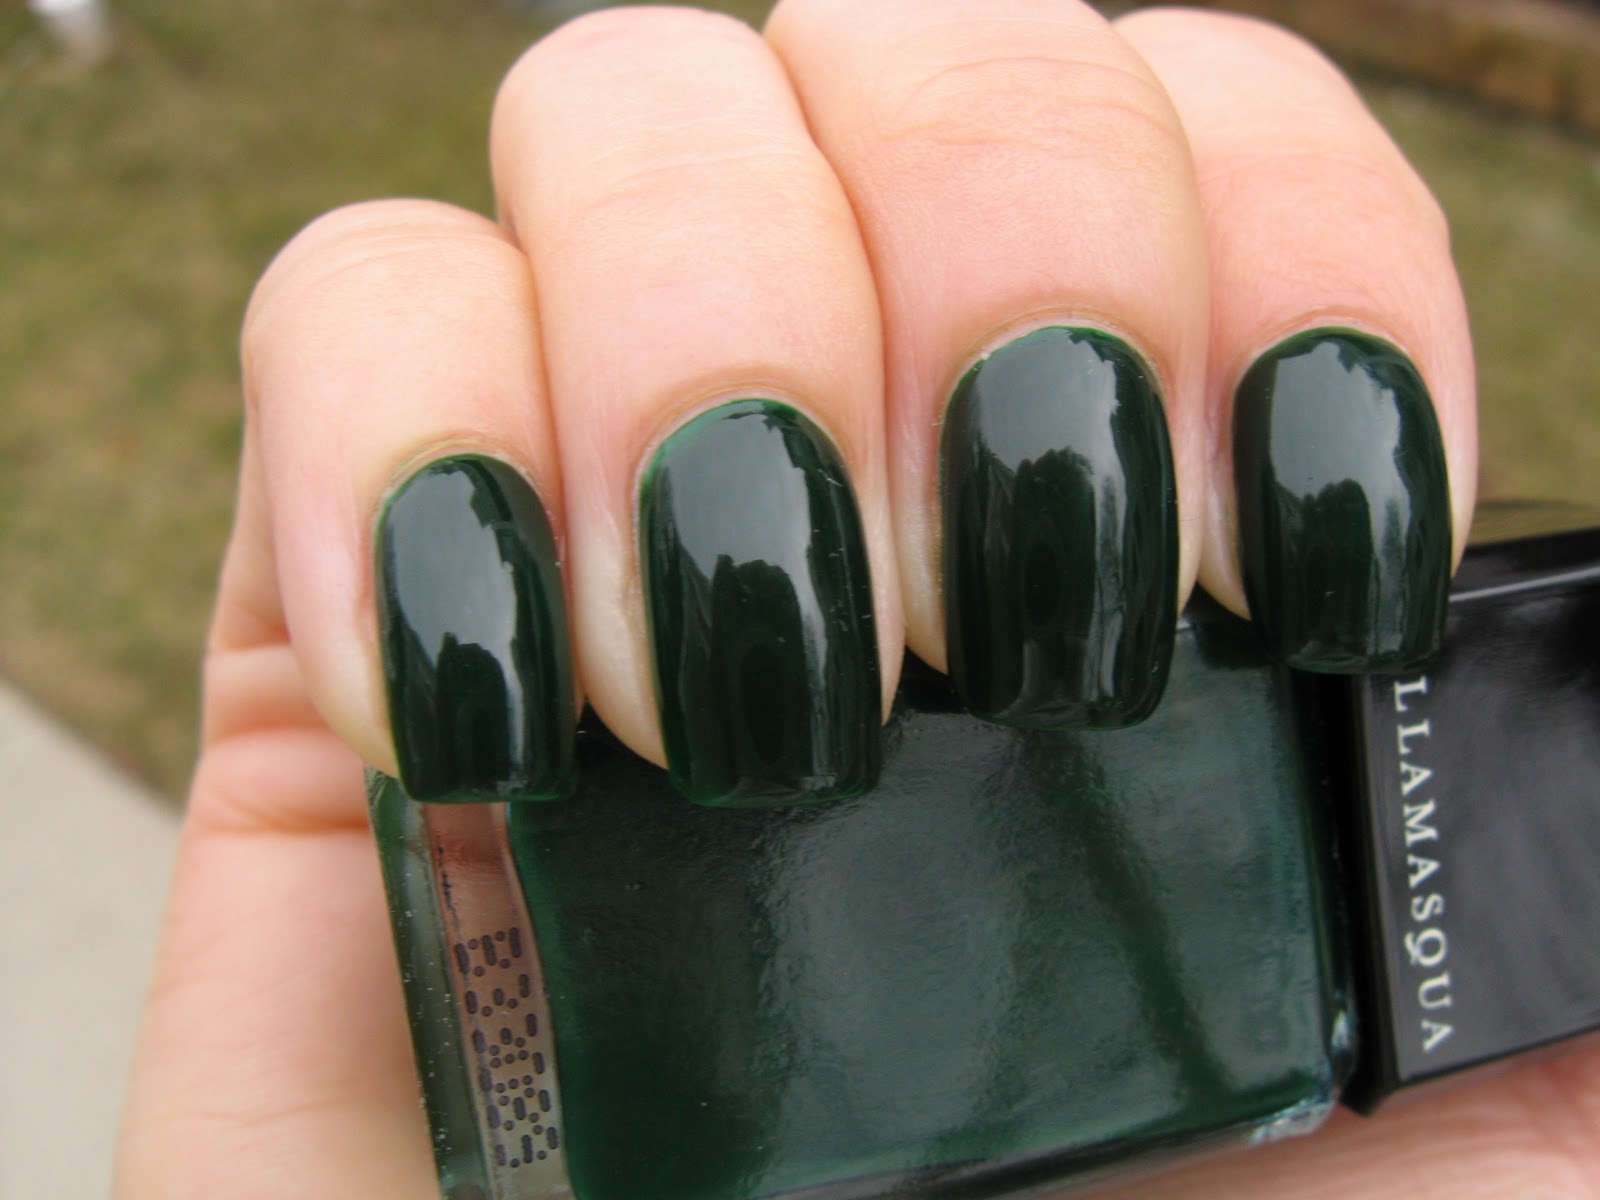
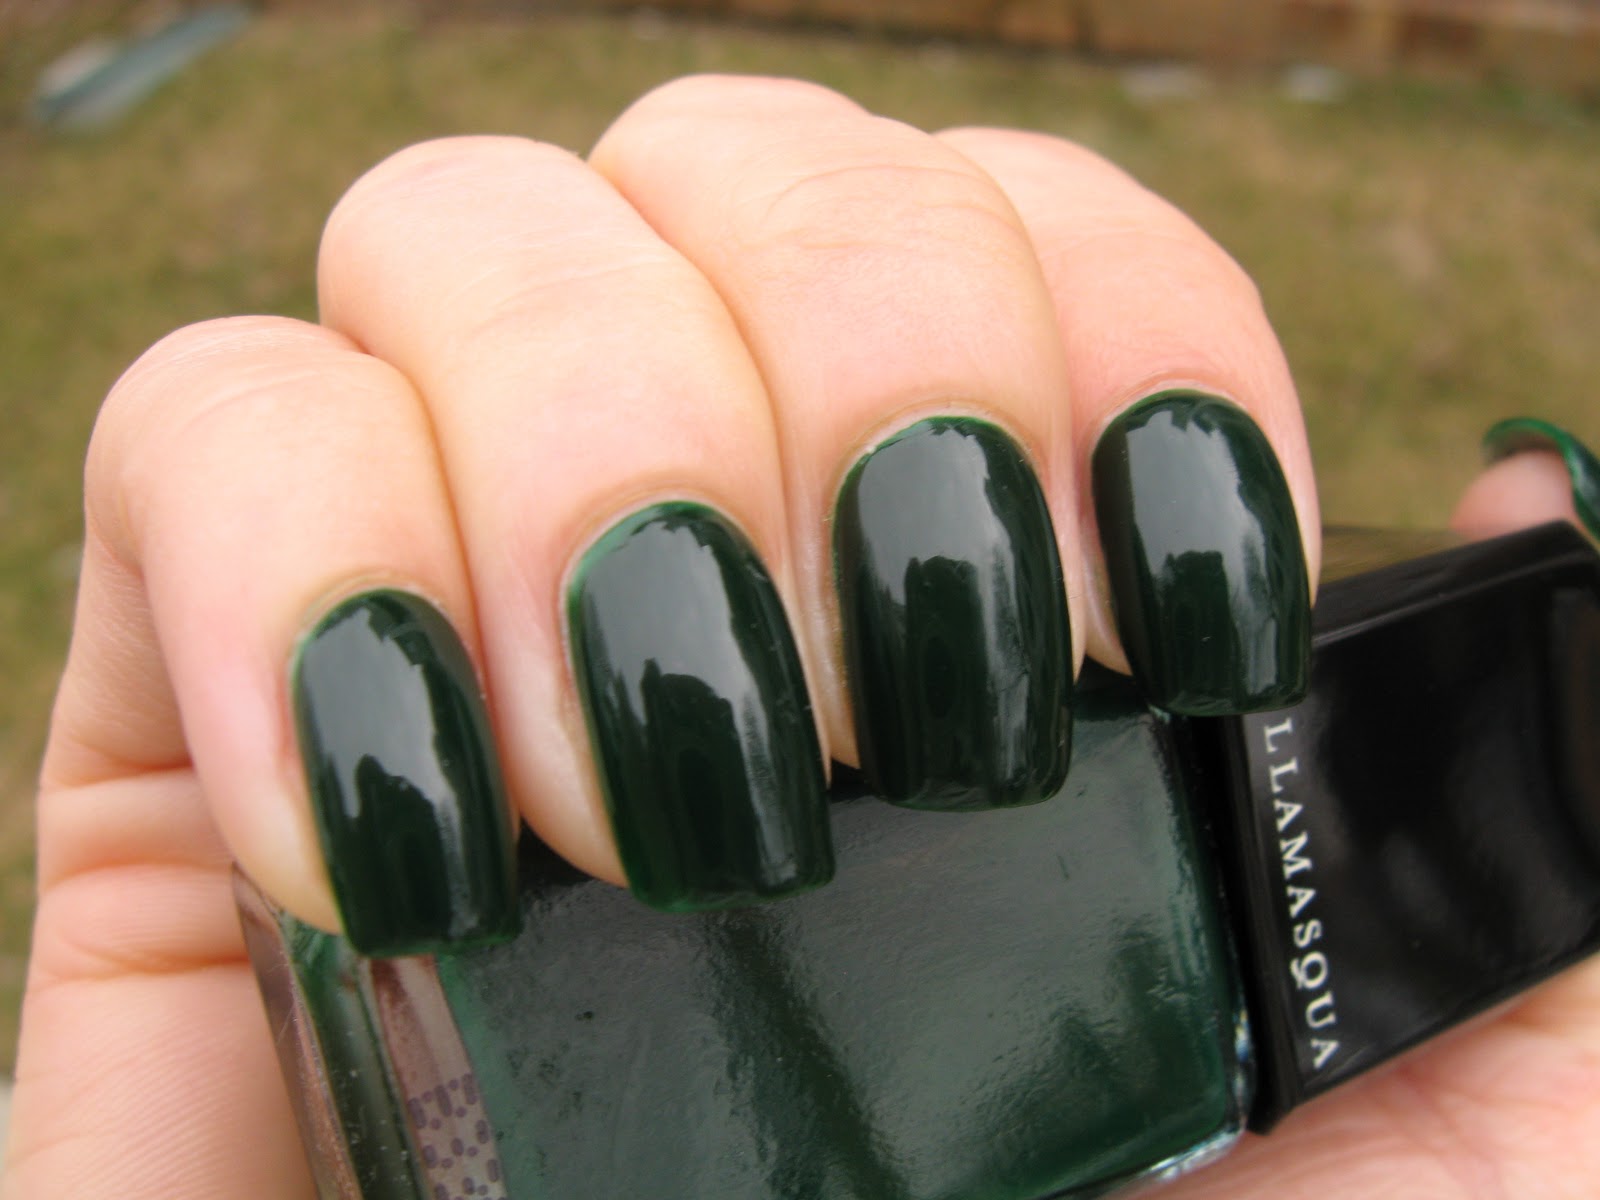
British Racing Green is a deep shimmery blue-leaning green.  The shimmer is pretty fine, but it's definitely noticeable.  It's almost a one-coater (This seems to be the standard for Butter Londons...awesome!), but of course I did two!  Application was good.  My only complaint was similar to when I reviewed All Hail the Queen - I felt like I needed to keep dipping my brush back in the bottle for more polish.  I just decided to get a huge blob on the brush at one time, and that made things much easier.  :-)

(click to enlarge)

I'm sad to say that after all that time it spent on my wish list, I'm a little disappointed in British Racing Green.  I mean, it's nice, but nothing to write home about really.  I like it, but I don't love it.  I did get a lot of compliments on it, though!  I think maybe I'm just not really a green girl (blasphemy, I know!).  Shrugs.

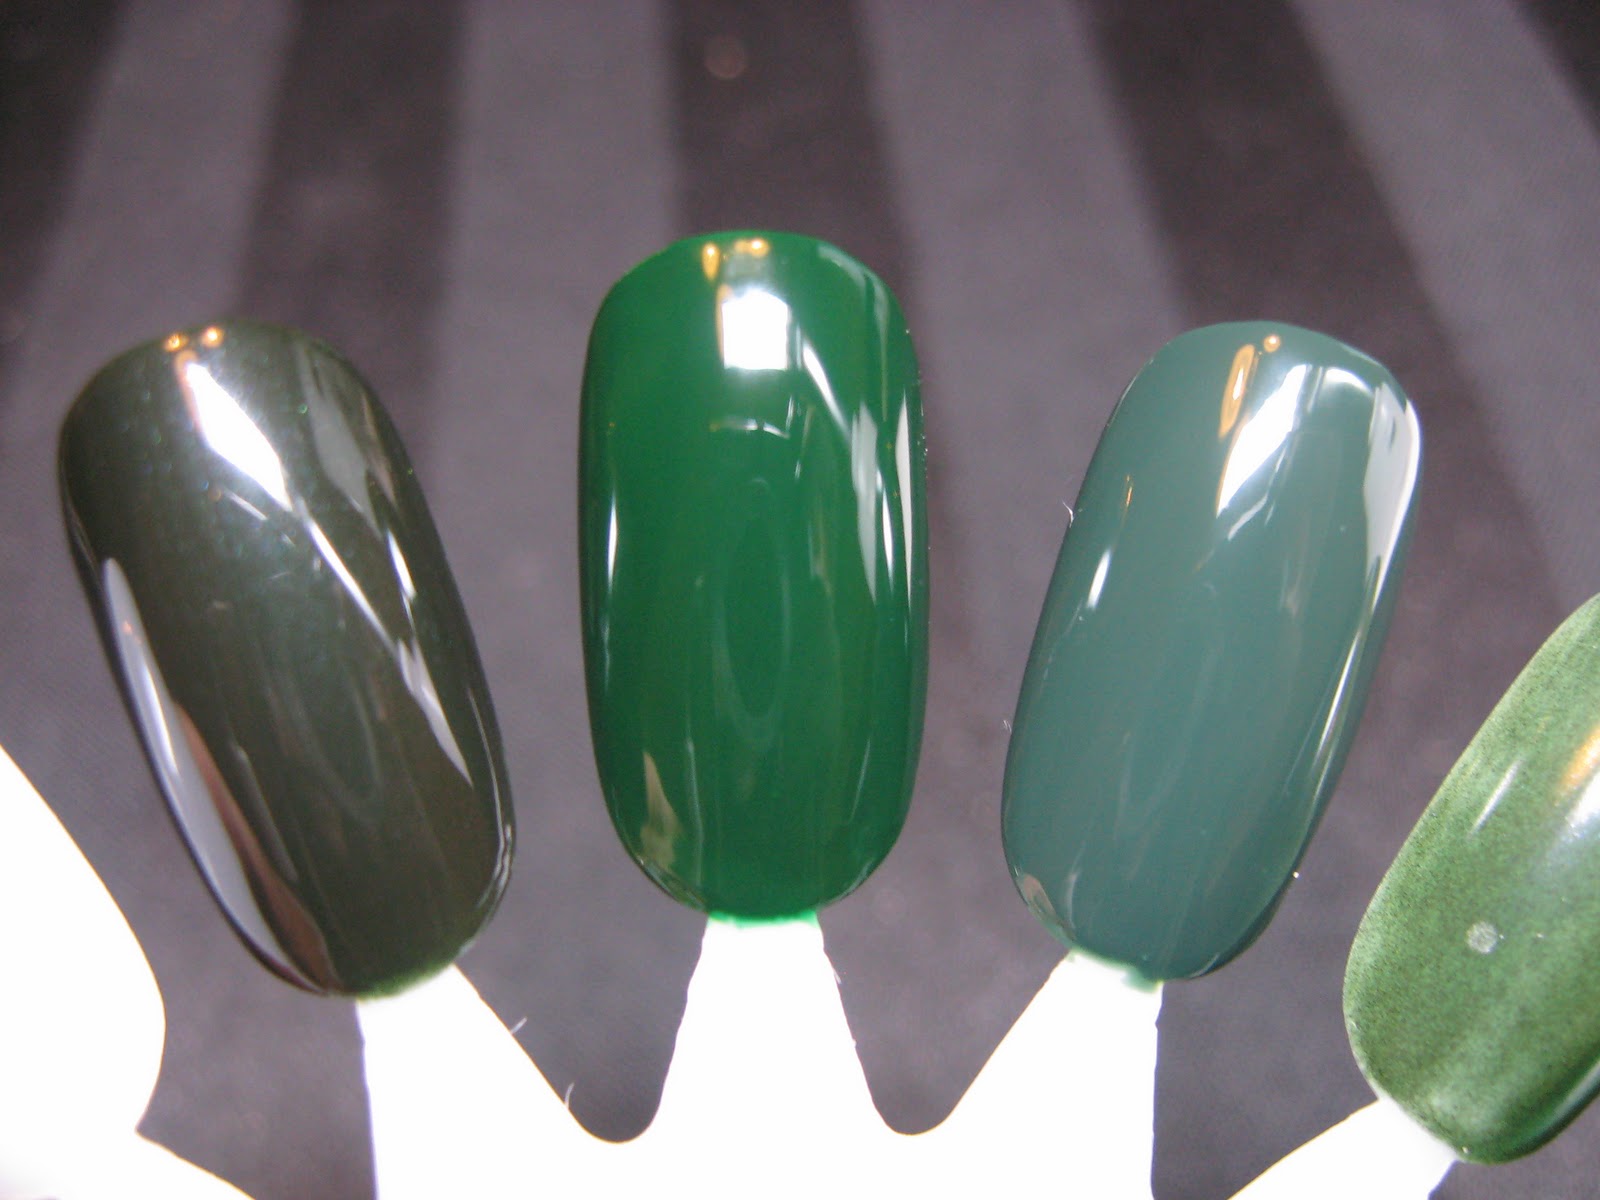
As soon as I applied it, I had a small panic attack.  I totally thought it was going to be dupey to China Glaze Jolly Holly.  It also reminded me of Orly Enchanted Forest, so I grabbed my nail wheel and swatched away.

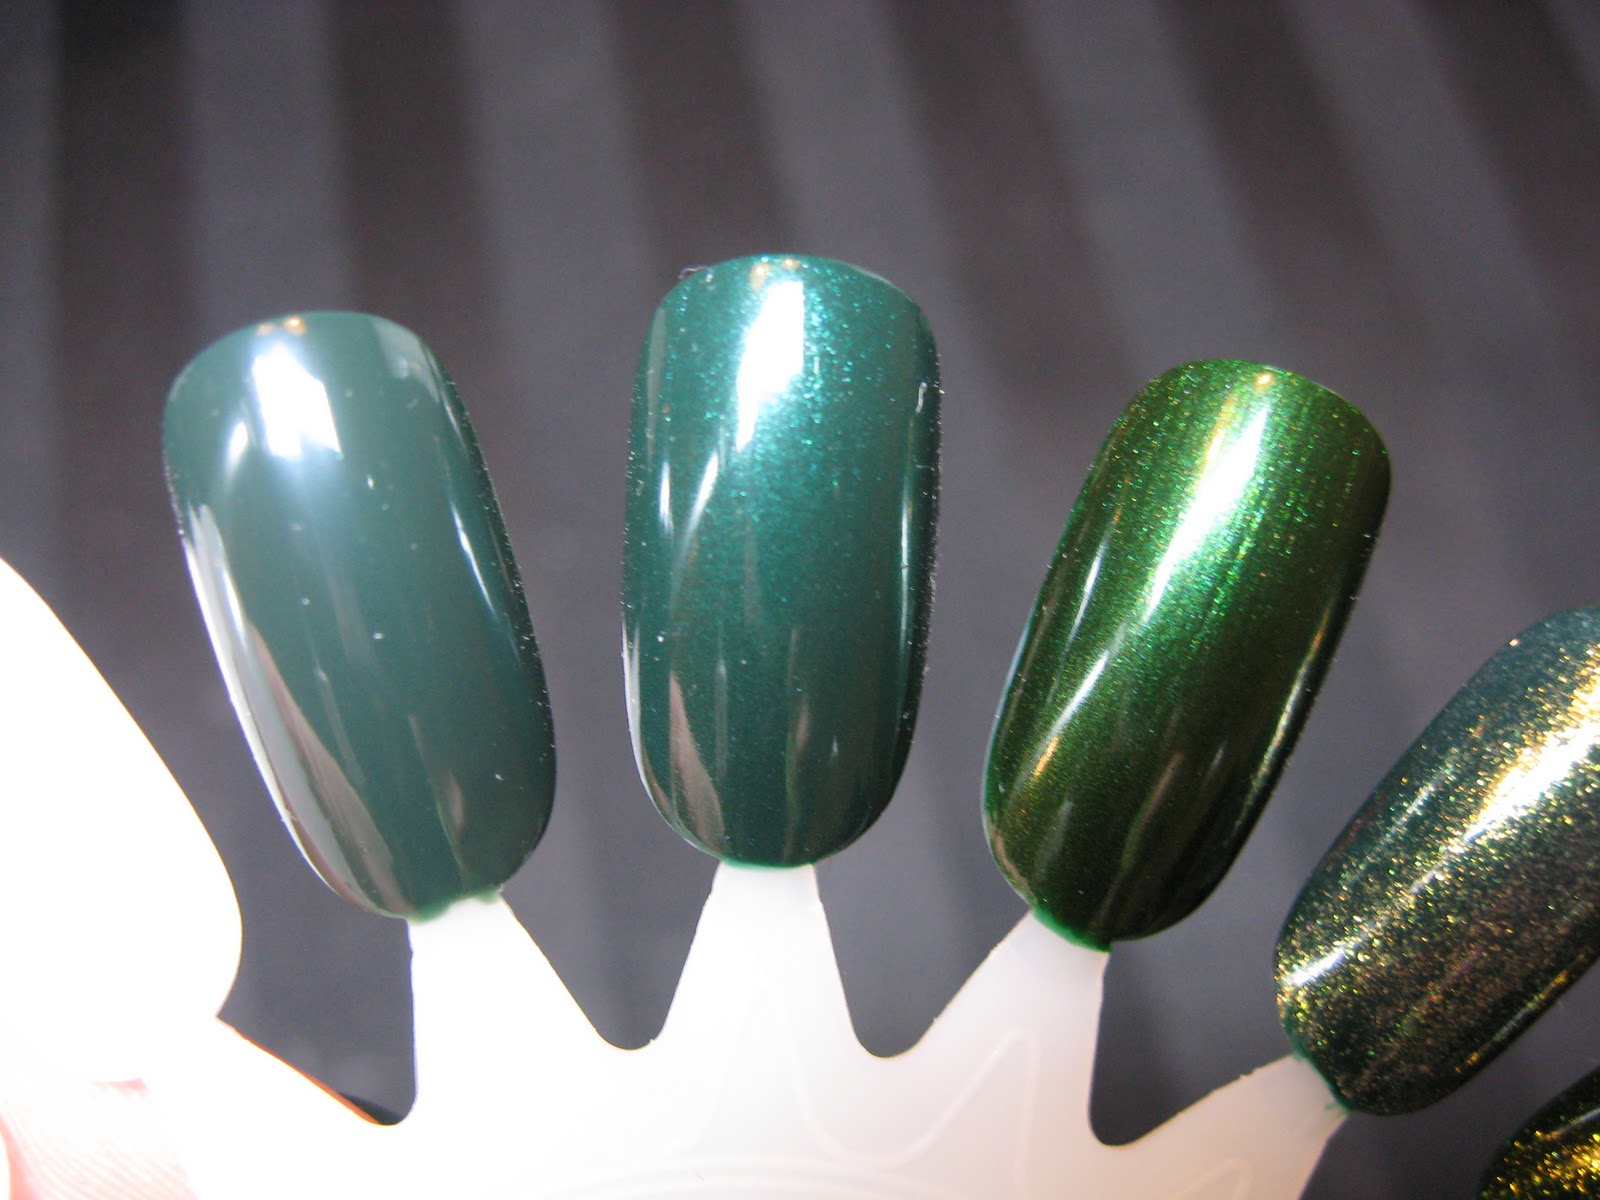
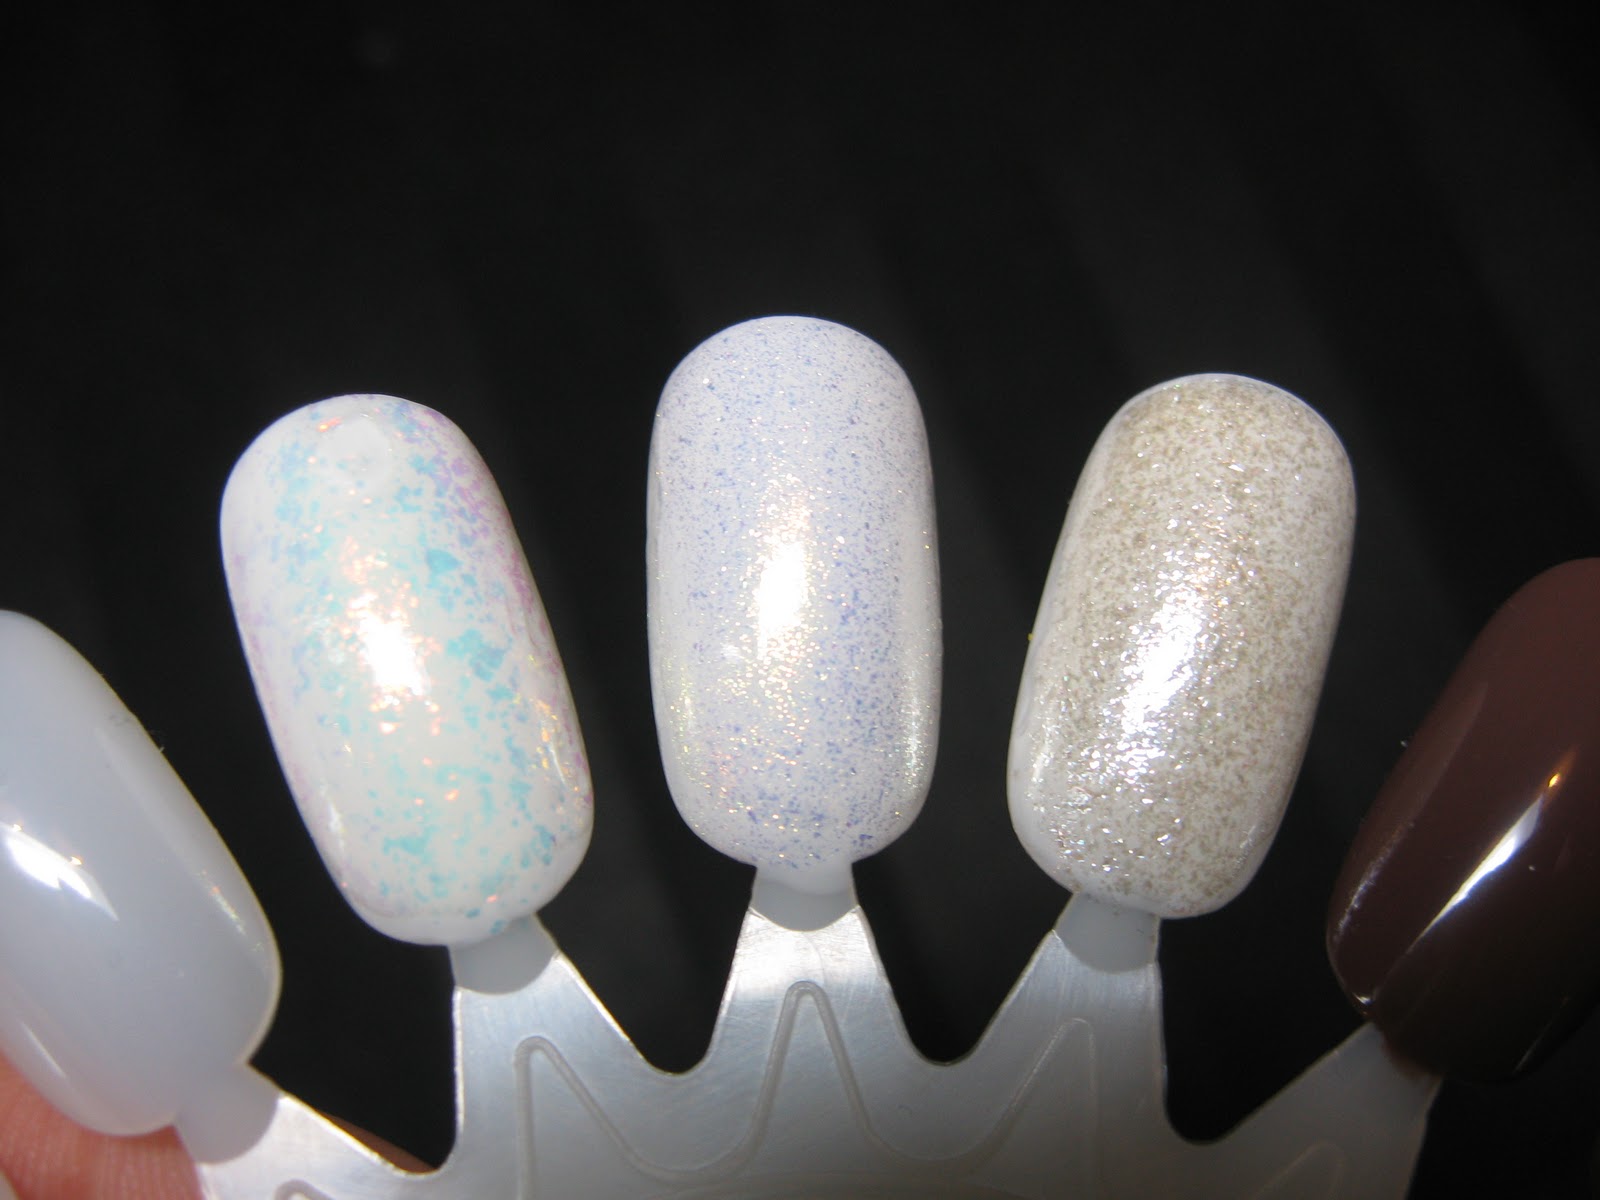
(L) to (R):  Orly Enchanted Forest, Butter London British Racing Green, China Glaze Jolly Holly

Sigh of relief.  Definitely not a Jolly Holly dupe!  Jolly Holly is MUCH brighter and more warm-toned.  But look how close the base color of British Racing Green is to Enchanted Forest!  It's kind of like a shimmery version of it!  With better application!  ;-)  If you're a fan of  Enchanted Forest, I think it's definitely worth checking out British Racing Green.  (By the way, that's China Glaze White Cap over British Racing Green on the far right.  FAIL.  So glad I tried it on my nail wheel first!)

British Racing Green is part of Butter London's core line, and you can find it at http://www.butterlondon.com/, http://www.ulta.com/, and at some Ulta stores.  It's $14 a bottle, so if you have your "Holy Grail" deep green, you can probably give this one a pass.  But if you're looking for an Enchanted Forest with just a little something extra, it's a winner!

Monday, March 28, 2011

Barielle Elle's Spell

Remember my love affair with OPI Merry Midnight?  Boy, was that a gorgeous polish!  I loved it so much that I immediately decided I needed more flakie polishes in my life.  I already had Sally Hansen's wildly popular Hidden Treasure, but that's really more of a layering flakie, so I was really after one with a colored base that could be worn by itself.  Enter Barielle Elle's Spell.

I passed on Elle's Spell when it was first released with Barielle's Holiday Hustle collection from this past winter, but the photos on MUA were just to die for so I arranged a swap to get one for myself.  You may still be able to find this on clearance for dirt cheap at your local Ulta.  Elle's Spell (This sounds like more of a Halloween name to me...am I missing something?) is a cherry red jelly polish with red flakies that also show gold, orange, and green tones.  It took three coats to get full coverage, but the application was a dream!  Seriously, this was probably the easiest-to-apply polish I've ever worn.  The polish stayed right where I put it and I could get a really nice clean line.

I apologize in advance, because it was REALLY hard to capture all that was going on with this polish.  I feel like you need a ton of pictures to see everything, and even then it's not enough.  For the life of me, I couldn't get my camera to pick up on the green flashes the flakies will do at an angle.  Those of you who own Elle's Spell know exactly what I'm talking about!  But anyway, on to the pictures!  And definitely click to enlarge these!  :-)


(Holy cow, red polish makes my hands look so pale in pictures!)  Isn't it pretty?  The flakies are subtle, but add such depth to the polish.  This is why three coats is worth it!  Oooh...ahhhh!  

A few days later I wanted to spice it up a little.  Everyone on MUA raves about mattifying flakie polishes, Elle's Spell in particular.  One coat of Essie Matte About You top coat later, and here's the result:


Um.  Ew.  I mean, don't get me wrong, I love how the matte look really shows off the flakes and makes them look kind of "frozen," but it took that gorgeous cherry red and turned it to ruddy nastiness.  I was baffled - I've seen this EXACT look on other girls look amazing!  It just didn't flatter my skin at all.  I'll still give matte flakies another shot, but not with Elle's Spell!

On a side note, Elle's Spell has been mentioned as being a good substitute for Sally Hansen Hidden Treasure, as long as you wear it over a dark color.  Since I now own both, I thought I'd compare the two over black just to see for myself.  This is one coat of each over one coat of Wet 'n Wild Black Creme:

(L) Elle's Spell, (R) Hidden Treasure

The flakes in Elle's Spell aren't quite as big or as dense as the flakes in Hidden Treasure.  They're also definitely a little more red-leaning and don't show that green flash as easily (you can totally see it on the right edge with Hidden Treasure, but only just barely on the left with Elle's Spell).  Definitely not exact dupes, but I'd say it might satisfy your lemming for Hidden Treasure, if you don't own it.

Bottom line?  I need more flakies!!!  :-D

Friday, March 25, 2011

China Glaze White Cap

Ok, so you didn't have to wait very long for China Glaze White Cap after all.  I just couldn't resist that gorgeous gold shimmer anymore!  This is the third polish I picked up from China Glaze's Anchors Away collection from this spring.  I seriously had it in my hands at least three different times.  Pick it up...put it back...you know the drill.  Finally, I saw a photo of it layered over Essie Marshmallow (the combination I should have chosen for my last post.  Sigh.) from a girl on MUA - I was sold.  Picked it up  the next day!

White Cap is, as you can tell from the bottle, a milky white polish with gorgeous golden shimmer.  On its own, it's really sheer.  It's not buildable at all - way too sheer to wear on its own (for me).  If you like sheer polishes, then certainly give it a try by itself.  No one needs to see the horror that lies underneath my polish, so here I have it layered over China Glaze Sea Spray, from the same collection.  This is one layer, and it was super easy to apply.

(click to enlarge)

I absolutely LOVED this combo!  It's stunning!  It's so sparkly and delicate and beautiful.  For some reason it reminded me of Cinderella's ball gown (silly, I know).  I wore this for five days, and I couldn't stop staring at my nails!

I've also seen White Cap look amazing over white, black, taupe, green, and especially grey (try it over Pelican Grey from the same collection!).  The combinations are obviously endless, but those are just a few to get you started.  The Anchors Away collection was released a few months ago, but you can still find it at Ulta and at www.transdesign.com.  Unfortunately, Sally's did not pick up this collection (*shakes fist*).

Any other layering suggestions??  I can't wait to try this over other colors!

Hope everyone has a great weekend!

Monday, March 21, 2011

Essie Marshmallow and Orly Winter Wonderland

Quick - someone write this moment down!  I'm about to show you a manicure I wore to work....and it wasn't an edgy neutral!  I KNOW, right?!  Don't worry, I'm not ill, and I promise you my unhealthy obsession with edgy neutrals has not ended.  *Cuddles with bottle of $OPI Metro Chic*  This was actually a two part manicure that spanned over four days.

I started out with Essie Marshmallow.  This polish had been on my list for a long time.  After seeing a comparison of whites from Scrangie (It's the second photo in this post.), I just had to have it.  Most whites are almost harshly opaque and somewhat chalky in texture.  Not Marshmallow.  It's a soft, squishy, jellyish white like no other.  Unfortunately, the price you pay for that squishiness is at least three coats.  There's no real application issues, it just takes that many to even everything out.  Scrangie used three, and you could certainly stop there.  I did four, because I wanted that extra opacity.  I love how it turned out!

(click to enlarge)

Such an angelic white.  And a nice change of pace from my typical "office colors."  I wore Marshmallow on its own for two days, and then I decided to spice it up.  I had a few "effect" polishes to choose from - Sally Hansen Hidden Treasure (an opalescent flaky), China Glaze White Cap (a sheer white with golden sparkles), and Orly Winter Wonderland (a soft white irregular fleck).   None of these are really buildable to opacity, which makes them great for layering.  Here's how each of them look over Marshmallow on my nail wheel (Sorry for the bad photos, it's difficult to capture the beauty in all of these!):

 (L) to (R):  Hidden Treasure, White Cap, Winter Wonderland
 (L) to (R):  Hidden Treasure, White Cap, Winter Wonderland

Why I didn't choose Hidden Treasure or White Cap is beyond me, but Winter Wonderland had been a lemming of mine since it came out in this past year's 'Tis the Season collection, and look how nice it is where the light hits it!  I had to try it out.  (And don't worry, White Cap will get it's moment in the spotlight soon!  hehe)  So here it is, one coat over Marshmallow:

(click to enlarge)

I promise you this looked better in person.  The lighting casts a strange beige color to it that isn't as noticeable in real life.  Maybe I should've taken a picture in the sun (D'oh!).  Can you see those irregular shaped flakes?  Winter Wonderland is kind of like if a shimmer and a flaky had a baby.  It's sparkly like snow on a sunny day.  It's interesting and pretty, and I did get compliments on it, but I'm not loving it.  Shame, since I waited so long to finally get my hands on it.  Oh well, back to the drawing board!

Thursday, March 17, 2011

My St. Patty's Day Manicure: Zoya Ivanka

Happy St. Patty's Day!!  Are you wearing your green?  I am!  Today I have for you Zoya Ivanka, which I have been saving up for today since January!  I picked her up during Zoya's epic Facebook promotion where they gave away three free polishes just for hitting 20,000 fans!  You guys, Zoya is one of the most amazing companies.  They don't take themselves too seriously (I'm looking at you, OPI!), they have great products, fantastic customer service, unbelievable promotions, and they really listen to their fans.  If you haven't checked out any of their polishes yet - head over to http://www.zoya.com/, browse the endless selection, and create an account.  Word on Facebook is there's another epic promotion going down SOON.  Yay!!

Ivanka is a yellow-leaning green (a little warmer than shows here on the photos) and gold glass-fleck polish.  The base is kind of sheer but it builds easily for opacity.  Application is amazing, as usual for Zoya.  I used two coats, but I might could've used three.  She sparkles like there's no tomorrow, and these pictures don't even begin to do her justice!  Click to enlarge to see just a fraction of her beauty!


Ivanka was released with Zoya's 2010 summer Sparkle collection (the unbelievable collection that included Charla and Mimi).  I'm not a huge green person - I only have a handful in my entire collection - but Ivanka is a must-have.  I can honestly say she was worth the wait!  Totally unique and absolutely stunning!  You can pick this baby up for $8 at http://www.zoya.com/.

I would also urge you to pick up Zoya's Armor top coat along with it.  As reported here by Michelle at All Lacquered up, Zoya's formula doesn't play nicely with most quick-dry top coats, and may lead to chipping.  But I don't want to wait that long for my polish to dry!  Me neither!  I always put Zoya Armor over my Zoya polish and THEN top with my quick-dry top coat, and I never have any problems with chipping.  Boom - problem solved!  :-)

I hope today is the luckiest of days for you all!

P.S. - Whaddaya think of the new design?!  I'm loving it!!  Spankin' new header is compliments of the incredible Brandon Smith.  Brandon and I went to high school together back in Missisippi, and he is genuinely one of the nicest and most talented people you could ever meet.  His work will knock your socks off.  You can check him out over at http://www.brandonasmith.com/.  Thanks, Brandon!!  :-D

Monday, March 14, 2011

Sally Hansen Salon Effects Nail Strips: Girl Flower

I've got a bucket of of fun for you today!  You've probably seen these at your local CVS, Walmart, etc.  Maybe picked them up, checked them out a little, put them back.  I did the same thing.  Like 10 times.  Curiosity got the best of me, and I finally caved.

Each package contains 16 polish strips, an angled cuticle stick, a little emery board/buffer, and detailed instructions.  The strips are real polish and, as I learned from Michelle at All Lacquered Up, are Big-4 free (meaning no DBP, toluene, formaldehyde, OR formaldehyde resin) - making these a great option for anyone with allergies to those ingredients.  

Application is a bit of a learning experience, but it's not really difficult.  You just find the strip that best matches your nail size (go a size up if you can't find one that fits perfectly), peel off the protective layer and backing, and stick it on, and remove the excess.  Getting the strips to line up perfectly with my nails was a bit challenging at first, but got easier as I did more of them.  

The hardest part for me was removing the excess on the tips.  You're supposed to use the file to kind of file it off and then buff to smooth, but for some reason it just wasn't really working that well for me.  Maybe I needed to use a different file than the one it came with.  I also had trouble getting the strip to lay flat against my nail at the tip - they kept wrinkling at the very tip and then I would pick at it and cause it to chip off (like that chip on my ring finger).  I imagine this will improve with practice.  It wasn't a huge deal - it just made it kind of rough around the edge.  If anyone has any tips for me, I'd GREATLY appreciate it!  :-)

It took me about 35 minutes to do all 10 nails.  Not bad for my first try, I think!  Check out the final look!

(click to enlarge)

How fun is that?!  Girl Flower is definitely an homage to the Minx nails that Katy Perry made so popular and it's a perfect look for spring and summer.  I think the pattern doesn't quite jive with my skin tone, but I still enjoyed wearing it.  Removal is absurdly easy with just regular polish remover.  

Think it's too busy for your own nails?  You could totally wear these on your toes (the cleanup will just be a bit more intensive).  I actually plan on doing it myself!  The price is a little steep.  I think I paid $10.49 for these?  But you can wait until they go BOGO 50% off and save.  Overall, I think these strips are a great product (you go Sally!) and I would definitely recommend them.  Seriously, if I can do this, anyone can!

What do you think?  Have you tried them?  Got any tips??

Friday, March 11, 2011

Essie Mink Muffs

My skin tone hates me.  I originally intended for this post to be about OPI Tickle My France-y.  The other day hubby and I were invited to a dinner party, which made me incredibly short on time for my manicure.  It's a nude polish that walks the line between creme and sheer.  Nudes are extremely forgiving in their application, which made it perfect since I didn't have all the time in the world to be cleaning up my inevitably sloppy manicure.  It's a fan favorite on MUA as an "interview-friendly" polish, and I was all excited to finally try it out after getting it for Christmas.  Sigh.

You guys, it was bad.  SO terribly bad.  It was so terrible it was turrible.  I got one coat on one nail and couldn't get it off fast enough.  I didn't even want to take a picture of it.  It looks SO good on everyone else, but my skin tone is the wonkiest skin tone on the planet.  It finds every weird mauve-y pink tone it can to pull out of my polish colors to mutate them into something hideous.  I'm never going to find my perfect nude.  I've pretty much just given in to that fact.  Maybe if I stop trying, it'll just find me.  

Plan B:  Essie Mink Muffs.   If OPI Suzi Says Da! was like dark chocolate, think of Mink Muffs as smooth milk chocolate.  It's another one of those addictive neutrals that I had on my list for a while.  I was pleased to find that it applied quickly and easily in two coats with no problems.  The cuticle drag on my ring finger was my fault, not the polish.  I was applying this polish like a madwoman.  Excuse the scratches in the finish and the mild tipwear - this photo was taken the day after I applied it.

(click to enlarge)

Simple.  Nothing too fancy here.  This isn't one of those polishes that I'm gonna say you need to have or should go run and get it now.  It's not that amazing, but it is nice.  As soon as I applied it, I was curious how it compared to Milani Teddy Bare (an almost dead-on dupe for Chanel Particulière).  Here's a bottle comparison:

(L) Essie Mink Muffs; (R) Milani Teddy Bare

Similar, but let's take a closer look...

(L) Essie Mink Muffs; (R) Milani Teddy Bare

Mink Muffs is a bit darker and more red-toned than the lighter and more yellow-toned Teddy Bare.  The real difference here is in application.  No surprise that the Essie is a thinner formula.  It applies smoothly, but the application on Teddy Bare is to die for.  It's like butter, and it's a one-coater for folks with careful application.  They're different enough to own both, but I would say if you weren't able to track down the limited edition Teddy Bare, Mink Muffs may satisfy your lemming.  It's in Essie's core line and you can pick it up for $8 at Ulta.  :-)

Monday, March 7, 2011

OPI Merry Midnight

It's not a very well-hidden fact that the hubby and I hate grocery shopping.  Like, hate it.  I just really couldn't think of much of a bigger waste of our time.  It takes like two hours and then we have to haul everything up three flights of stairs and then still cook it?!  And we also have this awful habit of either going when we're hungry, and therefore wanting to buy everything in sight (We totally need this oversized bag of Reese's peanut butter cups, right honey?) or going right after we stuff ourselves and then buy pretty much nothing (Food?  We need that stuff?).  It's just always a total nuisance, so we try to only go about once a month.  About two weeks ago the pantry was starting to look a little bare.  Off to Walmart...grumble...grumble...

So, our Walmart is one of those super Walmarts with a nail salon in it.  I've always kind of peeked in to see what they're selling - usually the current OPI collection.  For some reason, in the checkout line after our monthly shopping excursion, something happened to catch my eye from inside the nail salon.  I made hubby take care of all that payment business while I went to check it out.  Turns out it was just the jellies from the OPI Texas collection in a strange unmarked white cardboard display, but once I was in the door, I realized they had a huge shelf of polishes tucked away in the corner that looked awfully promising.  Just a few minutes of poking around and what did I find??


HOLY GUACAMOLE!  It's OPI Merry Midnight and a holographic My Private Jet!  Don't get too excited, it's not THE holographic My Private Jet that everyone will claw your eyes out for and/or sell it to you for $75 on eBay.  But it's definitely more holo than the current version.  Check it:


Awesome, right?  It's only about half full, but they sold it to me for $3!  Merry Midnight is almost completely full and was only $5 - SCORE!

This weekend I decided to test drive Merry Midnight, as it's a fan favorite on MUA.  It's definitely unique - opalescent flakes with blue and red shimmer, suspended in a berry colored jelly base.  It applies really nicely too.  Smooth formula and two coats!  I never thought I'd be drawn to a polish like this, but I...love...this!  I apologize for attaching so many pictures, but I couldn't pick just two!  Click to enlarge to see all the fun going on in this polish!


How awesome is this???  It's just so visually intriguing!  I haven't stopped staring at my nails since I put it on four days ago!  The only part about this that makes me sad is that it was released with OPI's 2009 Holiday Wishes collection, which means it's pretty hard to find now.  I hate that about those limited edition collections.  It's still available on eBay but you'll pay a higher price for it, so you may be better off trying your local nail salons that might still have a bottle laying around from last year.  It's so worth it, and the hunt is definitely part of the fun!

Hmmm...on second thought, there's another part about this polish that makes me sad - taking it off!  ;-)

Thursday, March 3, 2011

OPI Suzi Says Da!

Now this is me!  I needed a good cozy polish after my encounter with Illamasqua Rampage.  We just weren't a good match.  (It's not you, Rampage, it's me.  We're just better as friends.)  OPI Suzi Says Da! was just what the doctor ordered!  :-)

Suzi Says Da! (I hate these exclamation points that are part of the polish name) is a red-toned brown creme.  I know it pulls pretty red here, but this is definitely a brown.  Think dark chocolate, with red undertones.  Mmmm...chocolate.  It applies beautifully, too.  Perfect consistency, easy to control, and opaque and even in two coats.  What more could I ask for?

(click to enlarge)

Isn't it lovely?  It's so great for work too - a good neutral that's dark but never black. 

Suzi Says Da! was released with the Russian Collection from fall 2007.  Gosh, that was an epic collection.  I wish OPI would release another one with that kind of awesomeness.  I mean seriously, almost every single polish from that collection was gorgeousSigh.  Luckily most of that collection, including this one, made it to the core line, so you can get it at Ulta for the standard $8.50.  Yay!

Tuesday, March 1, 2011

Illamasqua Rampage

So, remember how Illamasqua Baptiste and I were completely in love?  Well, after our honeymoon, I ran out to Sephora to pick up another one of my Illamasqua lemmings - Rampage.  It's known as "The Jesus" on MUA, so I of course only had the highest of expectations for it.  Let's just go straight to the pictures (I took a few in different lightings, because Rampage is apparently quite the chameleon).

Under my Ott-Lite:


Outside, on a cloudy day:


Rampage is a blackened, forest green jelly.  Somehow the jelly finish brightens it, so even though it's a deep green, it's still vibrant.  It walks the "almost black" line, but never crosses it.  It's definitely the green that OPI's Here Today...Aragon Tomorrow wanted to be.

I don't know, you guys - I think someone needs to take my temperature.  This just isn't doing it for me.  I mean don't get me wrong, the application was flawless in two coats (and I completely expected to need three) and it's a lovely color, but I just feel kind of meh about it.  I don't hate it, but it just doesn't blow me away.  And for $14 a pop, it better!

I did a quick comparison of Rampage (3 coats) with OPI Here Today...Aragon Tomorrow (3 coats) and Orly Enchanted Forest (2 coats).

(L) to (R):  OPI HTAT, Illamasqua Rampage, Orly Enchanted Forest

You'll have to take my word for it that my lighting is washing out these colors.  HTAT is not this green.  For all intensive purposes, unless you're in FULL, DIRECT sunlight, it's black.  That's what was so disappointing about it.   And I'm shocked at how pale Enchanted Forest looks compared to these two colors!  It almost looks grey!  Trust me, it's much more saturated than it shows in this picture.  I'm gonna have to do a post on it just to do it proper justice.  LoL

Bottom line:  I'm not all that impressed with Rampage, but if you love greens, I think it'll be a keeper for you.  Maybe a good St. Patty's day manicure??  :-)